How To Fix a Broken Toilet Fill Valve
Because your toilet fill valve controls the flow of water and refills the tank after flushing, it can quickly become a headache when it breaks down. You can recognize that your fill valve is broken when your toilet isn’t filling up as high as it should or if it’s taking too long to fill. Luckily, if your toilet fill valve is broken, it’s straightforward to fix.
In this quick and easy guide, the experts at Lancaster Plumbing, Heating, Cooling & Electrical — who have over 100 years of hands-on plumbing experience — will walk you through how to fix your fill valve step-by-step.
Five Steps To Fix Your Toilet Fill Valve
If your toilet fill valve is broken, it’s important to fix it promptly. A malfunctioning fill valve is usually due to wear and tear or misalignment. Thankfully, you can fix the problem with these five steps:
1. Turn Off the Water Supply
As always, the first thing to do with any plumbing repair is to shut off the water supply.
Locate the shut-off valve for your toilet, which is typically on the wall behind the toilet and a few inches above the floor. Slowly turn the valve clockwise until there’s no water flow to the toilet.
With the water supply off, remove the tank lid and set it aside so it’s out of your way and won’t be damaged.
2. Drain the Tank
Now flush the toilet to drain the tank as much as possible. There will likely be some water left at the bottom, which you can remove using a sponge or towel. Having the tank as dry as possible will make the next steps easier and less messy.
3. Locate and Secure the Fill Valve
With the water off and the tank drained, you want to find the fill valve next.
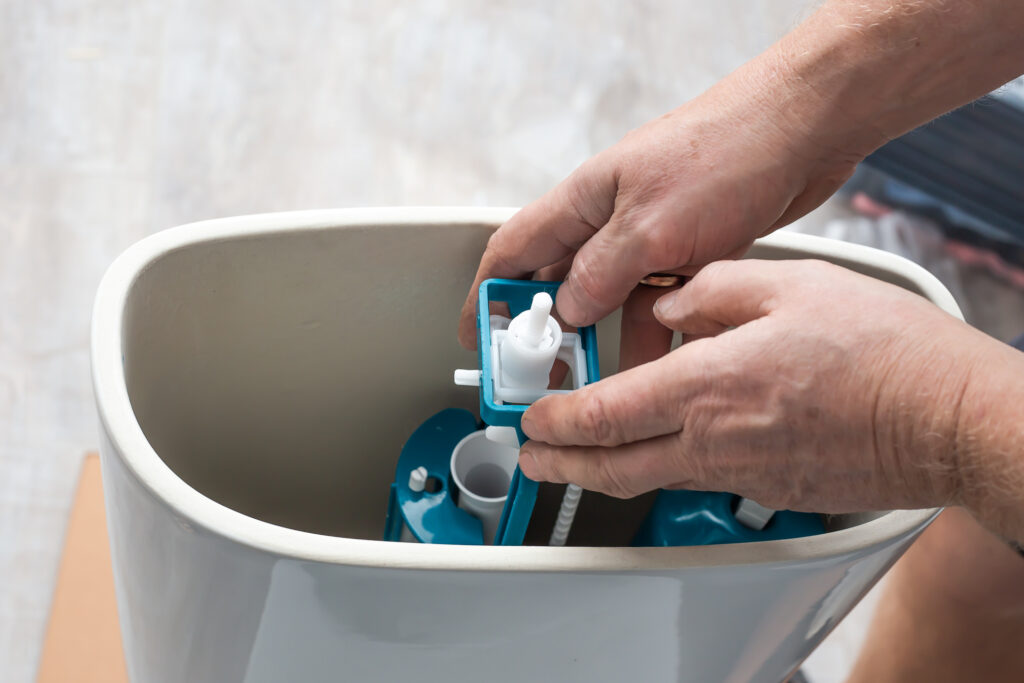
The fill valve, usually found on the left side of the tank, is connected to the water supply line. It’s the cylindrical component standing upright within the toilet tank.
After locating the fill valve, hold it steady with one hand and use your other hand to locate the nut that secures the water supply line to the bottom of the fill valve. You’ll typically find this nut on the outside and bottom of the tank.
Tighten the water line nut to secure the water line to the fill valve. It’s important to keep the fill valve steady with your other hand during this tightening process. Otherwise, the connection might not be secure.
4. Secure the Connection
Now that you’ve tightened the water line nut (but be sure not to overtighten it), it’s time to ensure the connection is secure.
Once the nut feels snug, slowly turn the water supply back on by turning the shut-off valve. Let the tank refill and carefully inspect the area near the fill valve for water seeping out. If you notice any leaks, you need to tighten the connection more.
5. Address Persistent Leaks
Securing the connection should usually resolve any leaks. If you notice water leaking around the fill valve after following these steps, you may have a bigger issue. You may need to replace the seal or the entire toilet valve. Seek professional help for major toilet repairs.
Contact Lancaster Plumbing, Heating, Cooling & Electrical Today
If you need a professional to fix your toilet fill valve, Lancaster Plumbing & Heating is here to help. Whether you need to repair or replace your toilet, our team has the skills and experience needed for all plumbing services. Our family-owned and locally operated company has served Pennsylvania homes like yours since 1904. You can count on us for reliable toilet repairs that last.
Trust Lancaster Plumbing & Heating for plumbing services in Pennslyvania. Contact us today to schedule your toilet repair.


